Cleaning PS5 after 5 years: easy to do at home, ready to welcome GTA 6
Executive Briefing
Synthesized and verified with gemini-2.0-flash-thinking-exp
“After more than 5 years of using the PlayStation 5, I had never cleaned it, until I saw that the dus”
Key Takeaways
- 1.After more than 5 years of using the PlayStation 5, I had never cleaned it, until I saw that the dust was thick and sticky, so I decided to clean it to prepare for GTA 6's release on November 19.
- 2.The reason why I decided to "dissect" this machine is simple, it is to prepare mentally and clean equipment to welcome GTA 6 released on November 19, the game that I have been waiting for 13 years.
- 3.The cleaning process is actually quite easy, you can do it yourself at home with basic tools without having to take it to the store.
After more than 5 years of using the PlayStation 5, I had never cleaned it, until I saw that the dust was thick and sticky, so I decided to clean it to prepare for GTA 6's release on November 19. The reason why I decided to "dissect" this machine is simple, it is to prepare mentally and clean equipment to welcome GTA 6 released on November 19, the game that I have been waiting for 13 years.
The cleaning process is actually quite easy, you can do it yourself at home with basic tools without having to take it to the store. Cleaning is quite easy, you can do it yourself at home with basic tools.
Tools to prepare
First is a set of screws to open the computer, but I only use three heads including parker screws, rosette screws and flat screws, leaving the remaining heads alone. Next is a toothbrush, you should choose bristles that are neither too hard nor too soft. In addition, there is an additional brush, small or large, depending on your choice.
You should choose a handheld vacuum cleaner or blower according to the dust condition of the machine. If you don't have one, cleaning will be more difficult. With my PS5, the dust was very thick and stuck to the radiator fan and air intake, so I had to use a blower, otherwise it would have been worse.
Remove the case and radiator fan
After preparing all the tools, I started by removing the two outer white plastic covers. On the side with the PlayStation logo, you just need to hold the top of the case tightly at the logo, lift it slightly and pull down and it will separate. On the drive side, hold the top of the case and do the same, lift up and pull down.
Next I will remove the radiator fan. First, I removed the fan protector. There are 4 screws, so you remember the shape and position.
After removing it, the next step is to remove the glue covering the fan's connection pins. It's stuck with glue so feel free to remove it. Leave it somewhere carefully to avoid dust, otherwise the glue will lose its effectiveness. I removed the fan connector and then opened the screws around the heatsink and protective pad to take the entire fan out.
I use a brush to clean the outside first, then move to the inside.
Advertisement
Because there was too much dust, I used a blower to blow the dust in the crevices, then used a brush and brush to clean it.
There is an extremely important note that I want to emphasize to you, that is, the radiator fan area contains the control circuit, absolutely do not wash with water. The radiator fan area has a control circuit so I don't use water, just clean it with a blower, brush and brush to ensure the safety of the board.
Remove the mainboard and deep clean
After finishing processing the fan, I continued to remove the 2 arc-shaped air intake pieces made of regular plastic. The operation is quite simple: lift up and slide out. These two pieces are made of plastic so you can wash them clean with water.
Next, remove the black plastic cover on the drive side. I removed the remaining 2 connector pins of the radiator fan, removed the black screws around the edge, then lifted out the black plastic cover. To clean the black plastic case, use a brush or brush to remove dust, then use a damp cloth to wipe the dust deep inside.
Advertisement
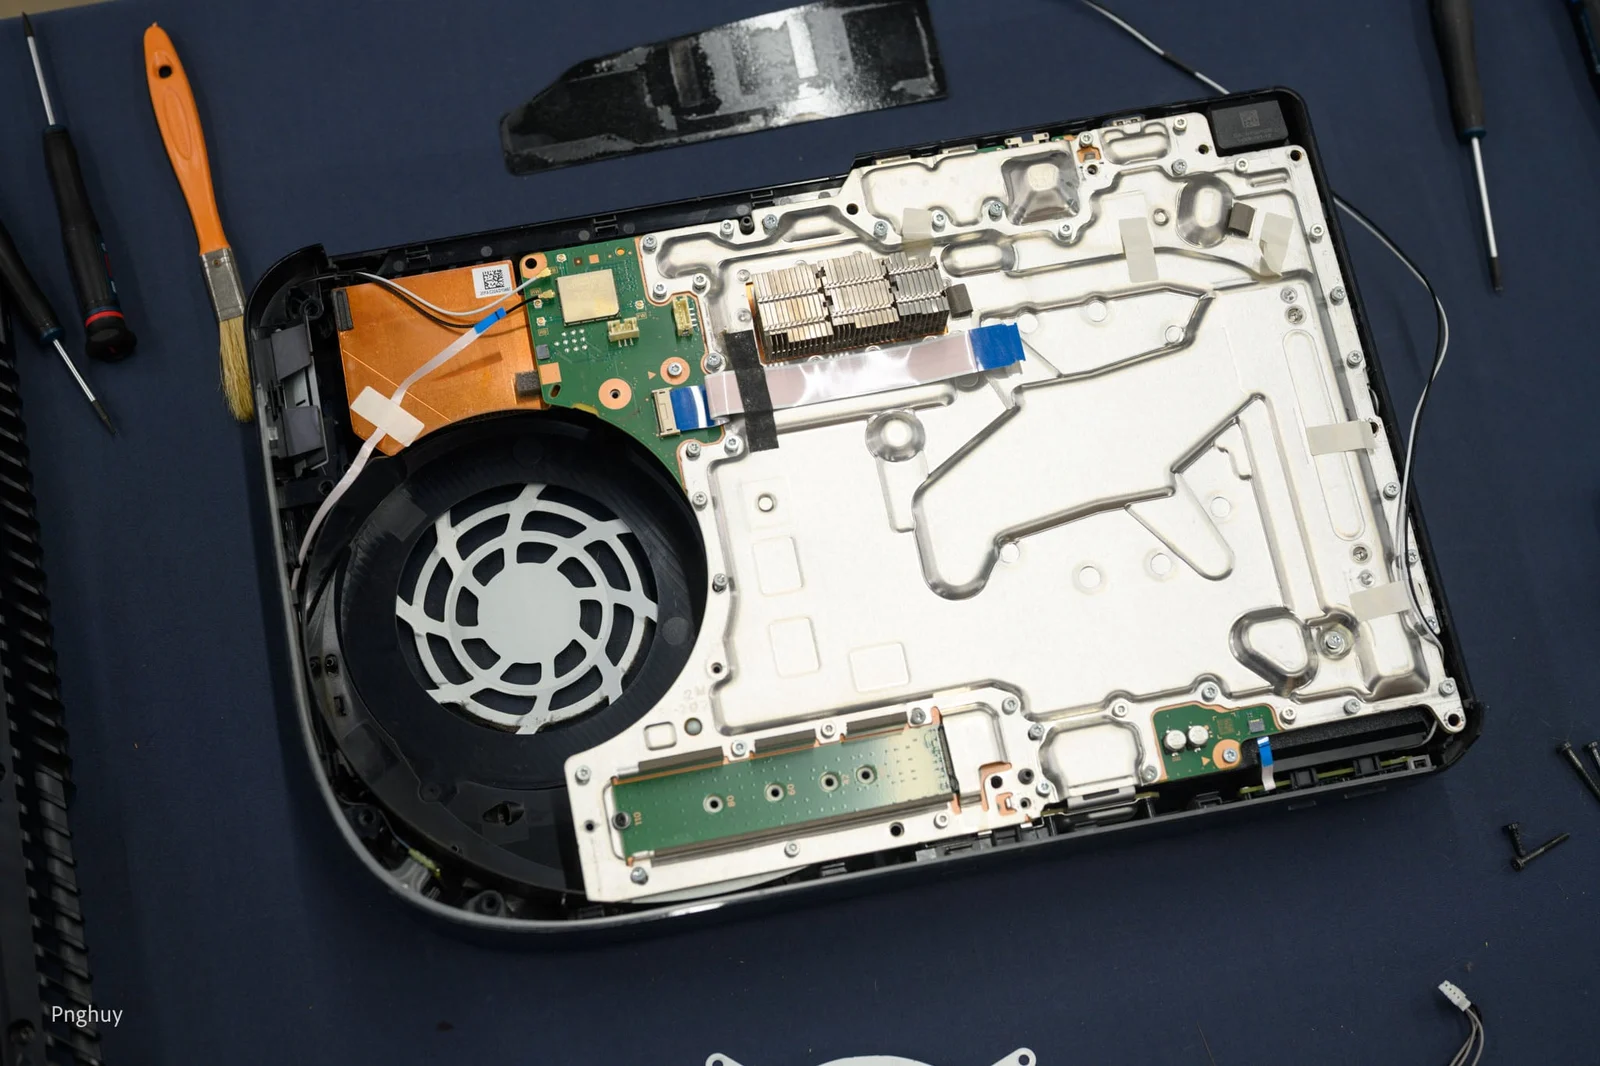
The next step is to remove the drive. I removed the mainboard connector attached to the drive and then lifted the drive out. Next, I removed the silver protective plate. This part requires removing the wire connecting the connection port by gently folding it with tweezers or fingers. Pay attention to the tape that secures the wire. If you accidentally tear it, you must replace the tape with a new one.
On this silver plate there are about 40 silver-white screws. I used rosette screws to remove them and I took a picture of the position of each screw to avoid confusion when reinstalling because there are screws for another plate. There is also 1 black screw on the bottom edge of the silver plate and 2 screws on the circuit position. After flipping the circuit over, remove them all and then lift the silver plate up.
The protruding heatpipe area on the silver plate needs to be cleaned with a brush, blower or vacuum cleaner.
To remove the mainboard, I removed the 2 blue connection pins in the upper corner near the connection port, removed the connection wire attached to the mainboard and then lifted the mainboard up.
This is the area with the most dust, especially the heatpipe and radiator area. I have to work hard to clean it because the dust is too thick, using a brush, brush, blower at a moderate speed or vacuuming. After cleaning, I found that the machine was not 100% clean, but it was less dusty, helping to improve heat dissipation and performance.
Finally, clean the power area at the bottom of the machine with a brush, brush, blower or vacuum cleaner, then reinstall it as before.
Time and notes
The first time you remove it, it will be difficult, but next time you will get used to it. The total time to complete this process is usually about 45 minutes to 1 hour and this number can be shorter if you are more knowledgeable.
Here is the radiator fan before dusting.
And this is after dusting.
This is the heatpipe after cleaning.
PS5 after cleaning.
Reinstall it and let's play hehe.
More pictures: